
| REVIEW OVERVIEW | |
BUILD QUALITY 90 % | |
FEATURES 60 % | |
DESIGN 70 % | |
PERFORMANCE 80 % | |
| SUMMARY The J-Hack Pure Mk2 is currently the smallest game case available. If this ultra small form factor is important to you, this is a fantastic case. | 75% OVERALL SCORE |
J-Hack Pure Mk2$89.99
Not long ago a reviewed the original J-Hack Pure. It was an ultra compact small form factor case that had an optional internal brick. It really won me over with its simple layout and design. The only issue with the case was that it had no room for dedicated graphics.
Thankfully J-Hack has been hard at work and now is releasing the Pure Mk2. This version is barely bigger than the original but offers a spot for a dedicated low profile GPU.
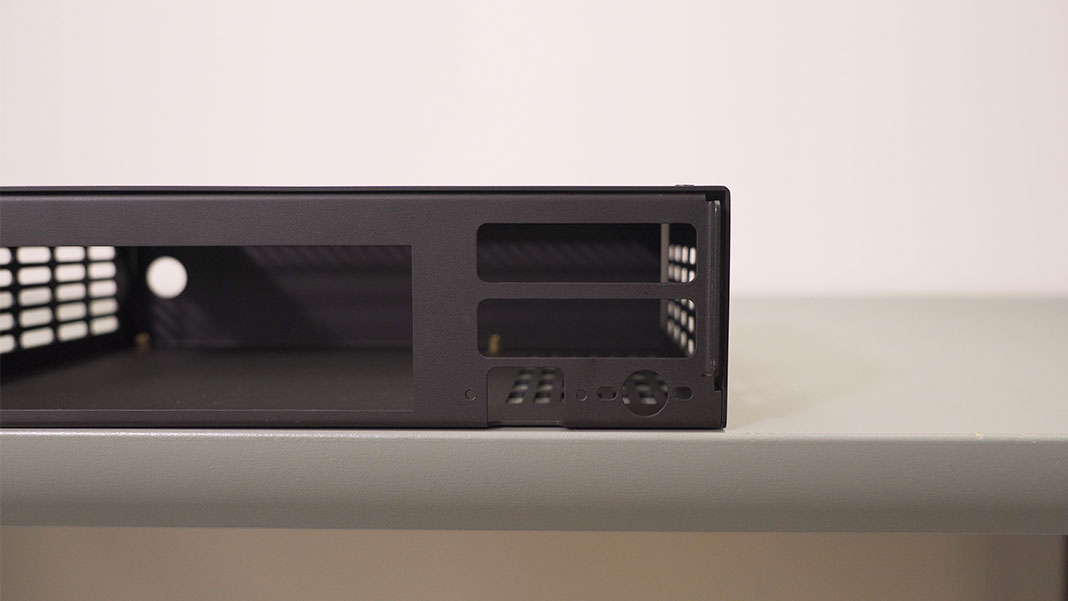
The back panel offers your standard rectangle for motherboard IO, cutouts for a low profile dual slot GPU/expansion card, and 2 spits for power connectors. The dual power plug slots make the case compatible with pretty much any AC-DC/DC-DC power supply.
Pure Mk2 Specifications
| Material | Aluminium |
| Motherboard Support | Mini-ITX |
| PSU Support | Direct Plug, Meanwell Internal |
| Max Cooler Height | 47mm |
| GPU Support | Low Profile, Dual/Single Slot |
| Fan Mounts | 2 x 40mm |
| Volume | 3.1L |
| Dimensions | 190mm x 250.5mm x 66mm |
Design & Layout
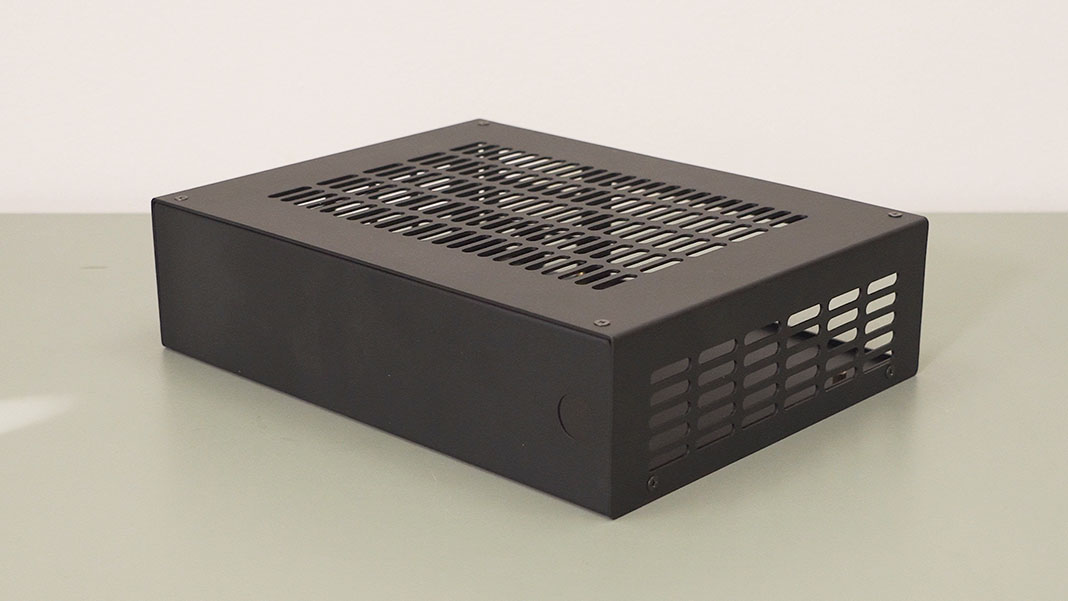

The J-Hack Pure Mk2 is a very simple case. On the front panel you will find a single cutout for your power button. There are not USB ports or another other IO, as is typical of small form factor ITX cases.
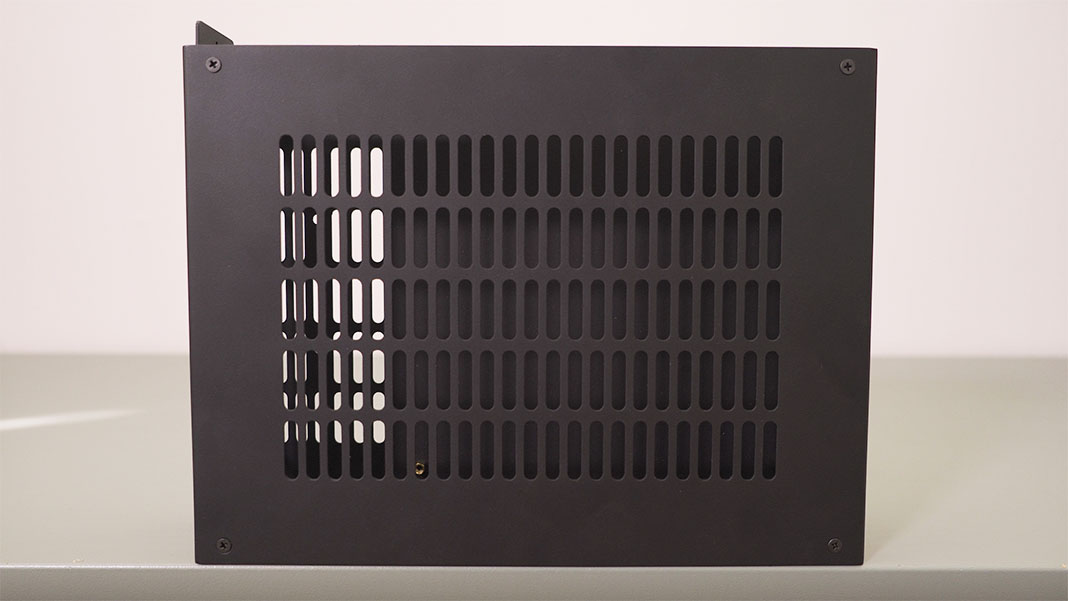
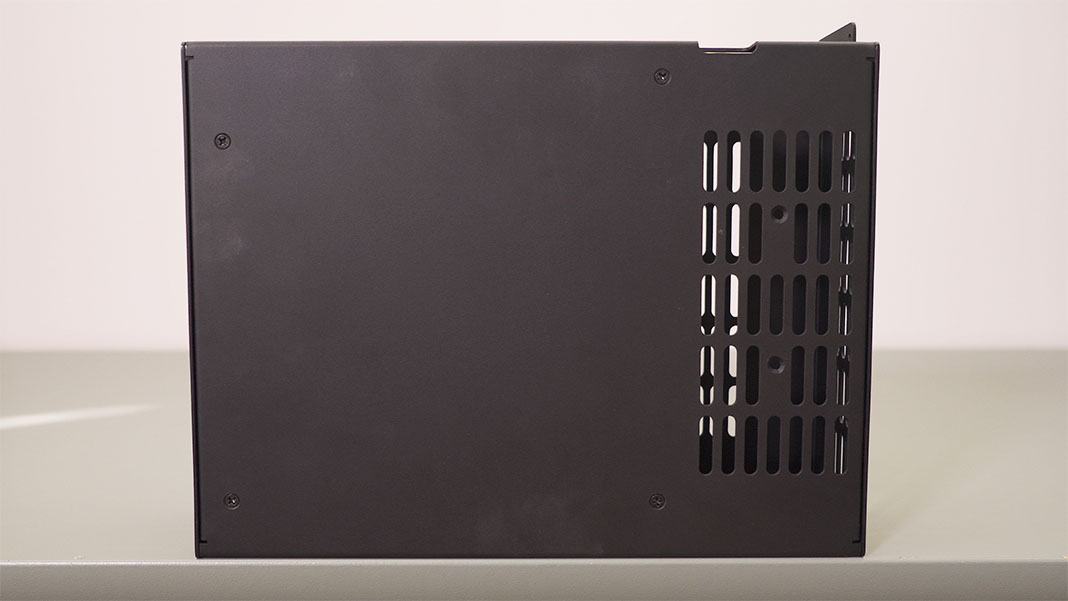
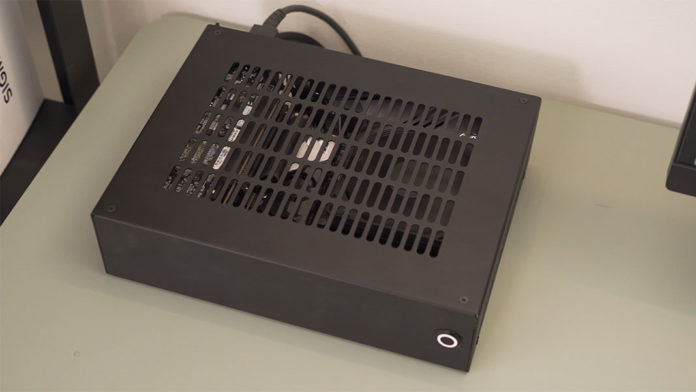
Around top you will notice one of the biggest changes. The top panel is almost entirely ventilation, allowing for increased airflow. Each side has a matching vent pattern as well.
The bottom of the case has changed as well. While the original Pure has a solid metal bottom, the Mk2 has additional ventilation on the right side directly under the new GPU slot.
The whole system is comprised of 2 solid pieces that connect to each other with 6 screws, 4 on top and 2 on each side.
Internally the Pure Mk2 is very simple. You will find 4 mounting points for your motherboard, and 2 additional mounting ports for an internal Meanwell power supply if you choose to skip the GPU.
Build Process
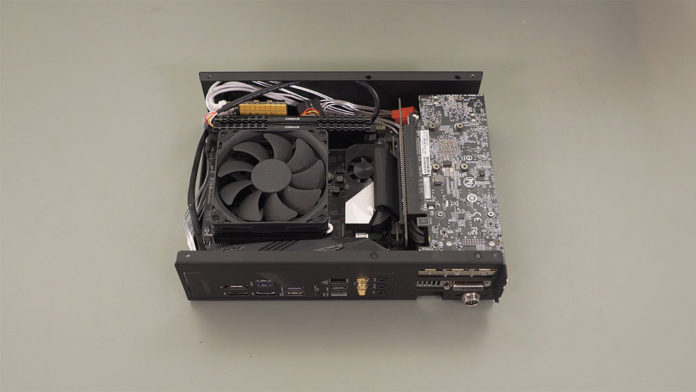 Due to its size and layout, building in the Pure Mk2 is very easy. Simply unscrew the top panel from the base, slide the motherboard into place, and add the rest of your components. To see a full system build check out the video above. The full part list can be found below.
The goal of this test system was to create an affordable mid-range gaming build that could play popular modern games at 1080p/60 at reasonable settings. If you were building a system for yourself, switching out the X570 motherboard for a less robust model would save some money.
Test System
| CPU | Ryzen 5 3600X |
| MOBO | Gigabyte Aurous X570-I |
| PSU | G-Unique 400W Direct Plug |
| SSD | Samsung 860 EVO |
| COOLER | Noctua NH-L9i Chromax |
| RAM | Corsair Vengeance 16GB 3200MHz |
Performance
 System performance fell right in line with what I was expecting. With a system like this I rated every game on a pass/fail system. If a game was able to average at least 1080p/60fps at medium or above setting it gets a pass.
So far every game I tested was able to do this. Many games are able to play at both higher resolutions, and High or Ultra settings. The low profile 1650 isn’t the most powerful GPU, but its surprisingly capable.
Gaming Test
| PASS/FAIL | |
| Apex Legends | Pass |
| COD: Modern Warfare | Pass |
| Halo MCC | Pass |
| Overwatch | Pass |
| Starwars: Jedi Fallen Order | Pass |
| Need for Speed Heat | Pass |
Temperatures
Temperatures is the area I expected the case to struggle the most. Thankfully temps were held in check. As you see in the chart below, outside of higher than normal idle temps everything else falls into a comfortable range.
I didn’t experience and CPU or GPU throttling. The vented top and side panels allow enough airflow to properly cool these components.
| CPU: Ryzen 5 3600X | GPU: GTX 1650 | |
| IDLE | 45C | 51C |
| Gaming | 70C | 78C |
| Render | 81C | 65C |
Ovs this build, thank-you for the share..
Hi bro! How much budget expenses? I like this.