TLDR: As one of now three mini-itx Ryzen motherboard options, the Asrock AB350 Gaming-ITX rises to the top of the heap. WIth rock solid performance, and an excellent feature set, it is hard to beat.
88
Overall
Score
BUILD QUALITY90
FEATURES85
CONNECTIVITY80
PERFORMANCE95
Ryzen is starting to mature as a platform, and with that maturation comes more mini-itx motherboards. I used the Biostar X370GTN in my first Ryzen build and wasn’t impressed.
Now Asrock has released their Fatality AB350 Gaming-ITX/ac motherboard. Is it any good? Lets find out.
Asrock AB350 Specifications
| CPU SUPPORT | AMD AM4 A-Series, Ryzen |
| CHIPSET | AMD Promontory B350 |
| MEMORY SUPPORT | Dual Channel DDR4 up to 3466MHz(OC) up to 32GB Max |
| Wireless | Intel Dual Band 802.11ac WiFi Bluetooth 4.2/3.0 |
| LAN | Gigabit LAN 10/100/1000 Mb/s |
| PCIE | 1 x PCI Express 3.0 x16 |
| POWER | 8-Pin, 8-Phase Delivery |
| AUDIO | 7.1 Channel Realtek ALC1220 |
| DIMENSIONS | 6.7″ x 6.7″ (170.18mm x 170.18mm) |
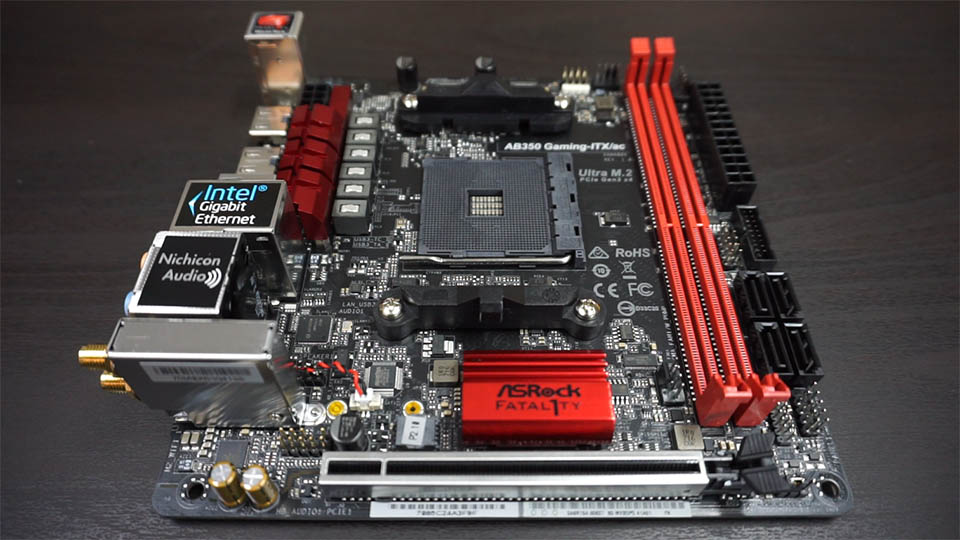
The board has a fairly standard layout, featuring all typical connectors you would expect. What sets it apart a bit, is the inclusion of 3 PWM fan headers, and 2 RGB headers. For a mini-itx motherboard, this is excellent. One of the fan headers is even located near the PCI-e slot towards the bottom of the board, making it easier to place fans throughout your case.
Unlike most mini-itx motherboards, all of the SATA connectors are located on the front side. This won’t be a problem for most people, but with some case layouts like the NFC S4 Mini it could be problematic.
Rear Ports & IO
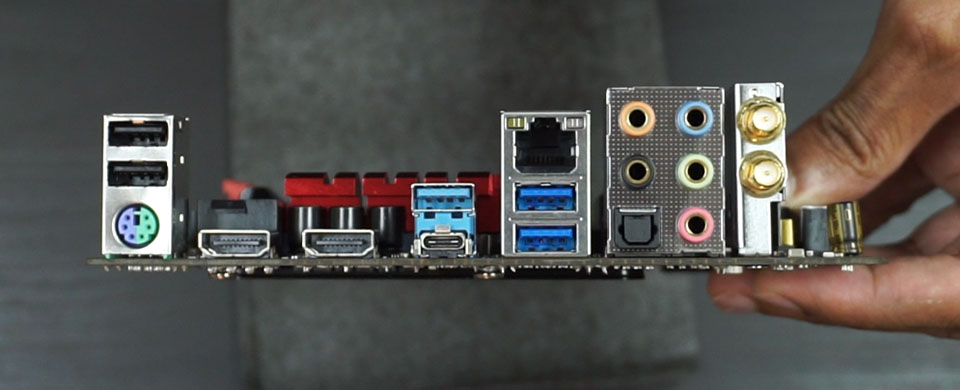
- 2 Antenna Ports
- 1 PS/2 Mouse/Keyboard Port
- 2 HDMI Ports
- 1 Optical SPDIF Out Port
- 2 USB 2.0 Ports
- 1 USB 3.0 Type-A Port
- 1 USB 3.0 Type-C Port
- 2 USB 3.0 Ports
- 1 LAN Port with LED
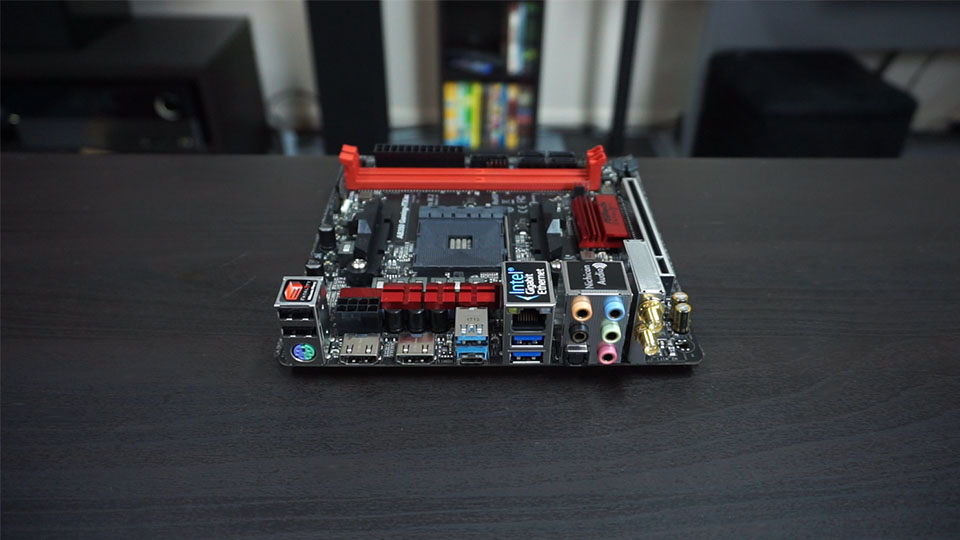
The rear IO is the only place where this motherboard really leaves something to be desired. It has 6 USB ports, however two of them are USB 2.0. The type-C port isn’t even USB 3.1. I found the lack of USB 3.1 to be an odd omission, especially when it is almost standard these days.
The included Intel WiFi/Bluetooth module is a 433Mbps unit. With the more expensive X370 version of this motherboard you get a faster 800Mbps module.
Asrock Fatality Gaming BIOS
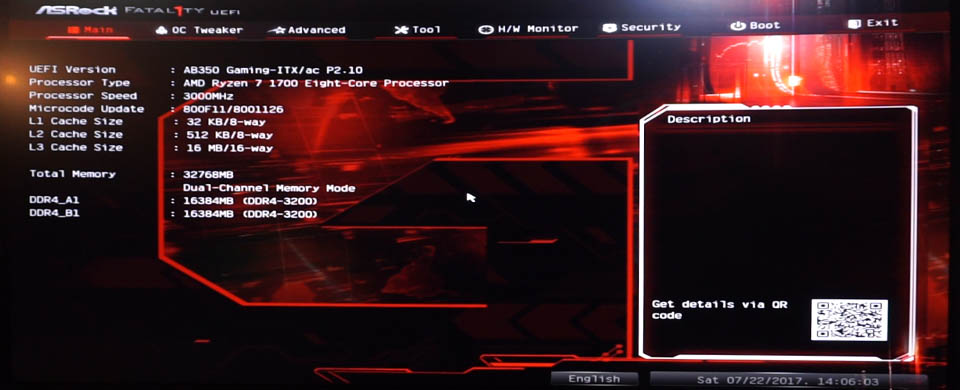 Asrock has done a really nice job with their UEFI. The Fatality Gaming BIOS is one of the best in the business. It has a practical layout, with common sense feature descriptions. The only company doing it better at this point would be Asus with their ROG Strix BIOS.
BIOS Overclock Settings
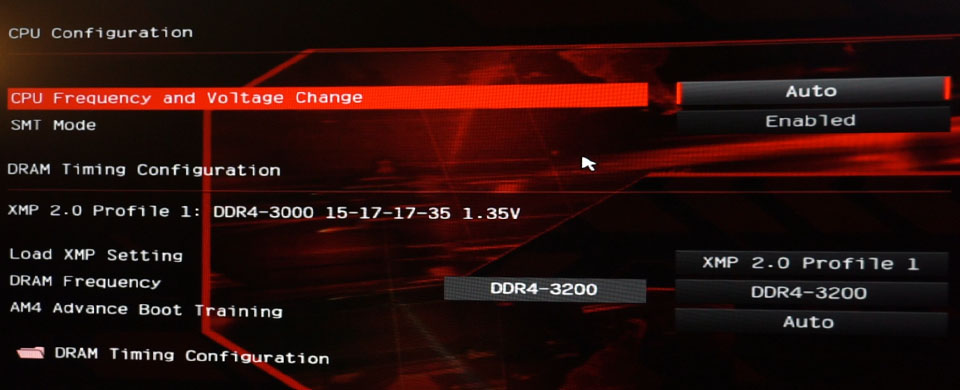 If you jump over to the OC Tweaker tab you will find the CPU and RAM overclock controls. Overclocking your components couldn’t be any simpler. Both offer manual and auto controls.
CPU Overclocking
For CPU’s you can adjust the core clock, and voltage. I was able to achieve a stable overclock of 3.9GHz with a Ryzen 7 1700 at 1.39V. The board handles overclocking very well unlike the other two mini-itx Ryzen boards currently on the market.
| CPU | OC Speed | OC Voltage |
| Ryzen 7 1700 | 3.9GHz | 1.395V |
RAM Overclocking
The RAM control allows you to manually manage the clock speed and timings. It also has an auto timing feature. So if you up the RAM frequency, the motherboard will adjust your timings automatically. It took my Corsair Vengeance LPX DDR4 3000MHz kit from 15-16-16-35, to 16-17-17-36 when I raised the speed to 3200MHz.
| RAM | OC Speed | OC Timings |
| Corsair Vengeance LPX | 3200MHz | 16-17-17-36 |
VRM Temperatures
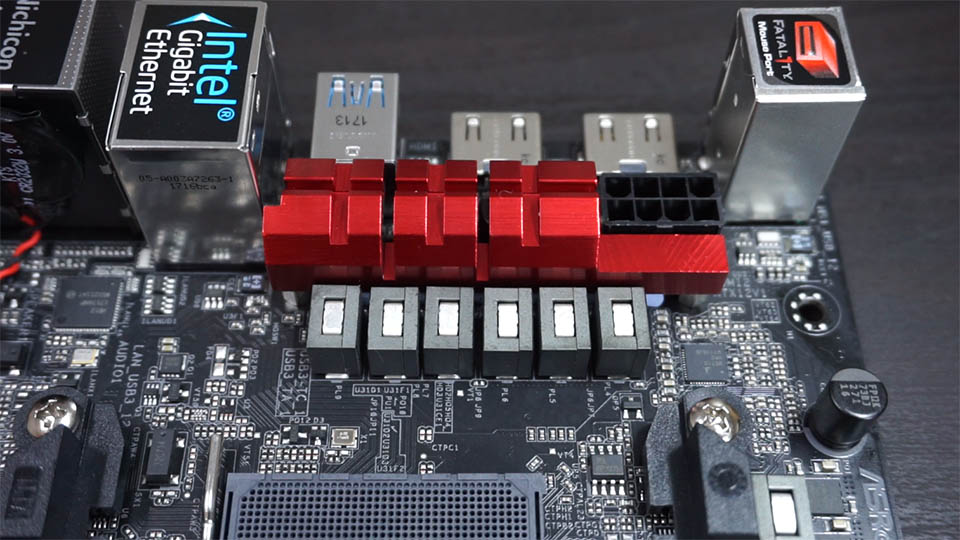 A hot topic when it comes to Ryzen AM4 motherboards has been VRM temperatures. Both the Biostar and Gigabyte mini-itx AM4 offerings reportedly have struggles cooling their respective VRM’s when overclocking.
Unfortunately Asrock did not include VRM temperature sensors with this board. While I don’t have a laser thermometer yet, I can confirm that to the touch there does not appear to be a cooling issue. The Biostar VRM’s were noticeably hot when touched while overclocked. This board does not seem to have the same issue. I will update this section once I get a proper IR thermometer.
Conclusion
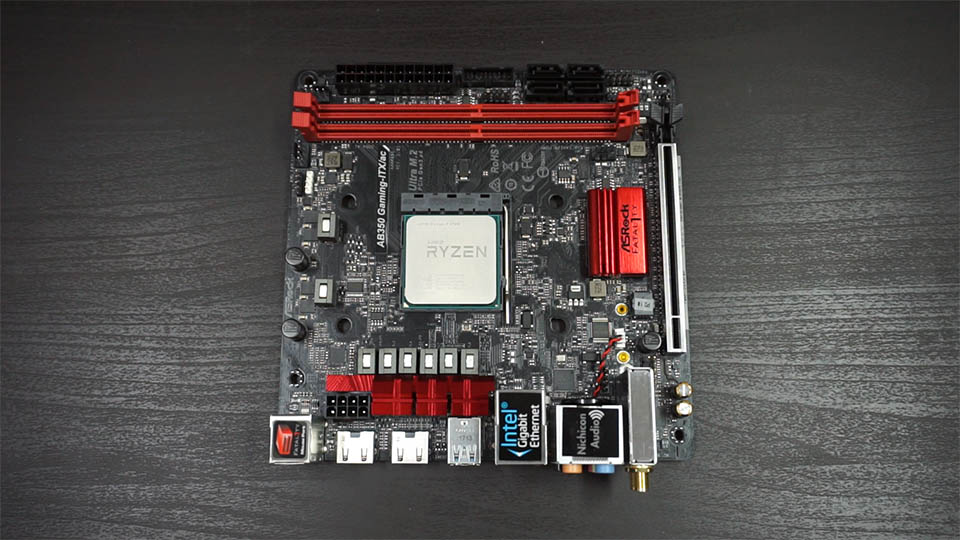
Asrock did a really good job with the AB350. It has almost every feature you would want from a mini-itx motherboard. Including an excellent easy to use BIOS, and rock solid CPU/RAM overclocking.
Some of you may see this next to its more expensive brother the X370 Gaming-ITX. The only difference between the two is the chipset, and WiFi module. The chipset difference is largely irrelevant since mini-itx motherboards only have one PCI-e GPU slot.
At this point, the Asrock Fatality AB350 Gaming-ITX is the mini-its Ryzen motherboard to beat.
For more info the video review above shows board layout, BIOS settings, overclocking and fan control settings.
Test System
| CPU | AMD Ryzen 7 1700 | |
| CPU Cooler | Noctua NH-L9a | |
| RAM | 32GB Corsair Vengeance DDR4 3000MHz | |
| HDD | Samsung 960 EVO 256GB | |
| GPU | Zotac GTX 1060 Mini | |
| PSU | HDPlex 160W | |
| Power Brick | HP 230W |


No pwm control for cha_fan2 which is annoying, you must be careful to hook up a low noise/rpm fan to it as it will run full speed all the time. Cannot be regulated via Bios nor F-Stream utility , 🙁
There is PWM fan control for all 3 fan headers in the BIOS.
Sorry to contradict you, it is indeed in bios, but it is not working in fact, the fan speed is not detected properly thus the 4 pin pwm fan attached to cha_fan2 runs full speed all the time, no matter which setting you select , “Silent”, “Standard” or “Performance”. Tried to tune it with F-Stream utility, the fan speed is detected at ~ 1350 rpm for all percentages from 10% to 90%, I would attach a pic if I could. At least this is the situation with my sample. Maybe yours is fine, case in which mine is broken, as I could not make it work. If you can test it and confirm it is working on yours, I would be grateful.
Your board may be faulty, my headers are working fine. Did you try running the fan tuner before setting the speeds?
Hi, I cannot set the fan_cha2 speed in any way other that the one already preset, my bios is the last one 3.00, I did run fan tuning in bios and while for fan_cpu and fan_cha1 I can see an option as PWM, for fan_cha2 there’s none. And it seems this pb is not singular, saw some posts over internet related to Asrock Z170 mITX that have the same issue of fan control over fan_cha2. Anyway, what do you use in fan_cha2 as setting, cpu or mb detection ,and what setting, Performance, Standard, Custom, Silent?
Were you plugging in 3-pin nonPWM fans into cha_fan2?
I did and also got no fan speed control.
I’m having the same issue. Have you found a fix?
NO, seems it does not have also PWM/DC capabilities, all fans must be 4 PIN PWM otherwise if 3 PIN they will run full speed.
Can you tell me how hot the CPU is running overclocked? My 1700X at 1.3V got to 85c in Aida64 stability test with a NH-L12 cooler single fan mode, so your 1700 must be running really hot, right?
Heat will depend entirely on your case and cooler. What setup do you have that is resulting in 85C temps?
Any update on the vrm temps?
Buldzoid did a video about this mobo, and he explained that the thermal pad underneath the VRM heatsink being very thick, heat transfer (or energy transfer) was seriously impeded. This translates to lower temperature of the heatsink itself, but increased temperature of the mosfets. Careful on this one.
Have you heard of the issues with the hdplex 160 just not working with certain builds. I purchased the ASRock board and it won’t even post.
I have not, I am using the 160W and this board in my current build. It is working just fine. Usually the power bricks go before the HDPlex units. I would check that first, if not contact HDPlex and see if you can get a replacement.
Ok thanks. I got two units from hdplex and neither work. The Dell 330w brick is brand new and the indicator light is on. I’ve rma’d the motherboard so we’ll see how that goes.
That really sucks man, HDPlex makes really good stuff. Did you make sure you have everything wired up properly? Other people have switched the power and GPU cables.
Also, did you try another PSU?
Yes, I tried two different power bricks and two different hdplex’s. The wiring was confirmed correct by hdplex. power brick -> ac-dc connector -> hard wires coming off hdplex. Then the 4 pin CPU output to the 8 pin CPU power input using the 4+4 wire. They specifically said to use the 4+4 and not the 6+2. Hopefully I hear back from the vendor that sold me the motherboard soon. Thanks for the help.
Hi Jay. I got my new motherboard the last was defective. Have you noticed that when booting the system sits at the ASRock logo for a long time? The fast boot option in the bios didn’t help.
I have not. How long of a hang are you seeing?
> I will update this section once I get a proper IR thermometer.
When should I check out? 🙂
Can you post a screenshot of your timings/settings using Ryzen Timing Checker?
http://www.overclock.net/t/1624603/rog-crosshair-vi-overclocking-thread/18220_20#post_26137022
I have the same kit but haven’t be able to get my RAM to 3200 MHz.
I have the same kit too (and mobo and processor), and mine are stuck at 2133 MHz. If I try to apply the values from the XMP profile, the machine reboots 3 three times, and the RAM is back to 2133.
If would be really happy just to achieve the 3000 (Or 2966) MHz.
I ended up changing motherboards (returned to ATX) so these settings might not all be available to but, it’s worth a try.
SOC Voltage: 1.10V
DRAM / DRAM Boot Voltage: 1.40V (I don’t think DRAM boot voltage is available on MSI boards)
ProcODT: 80 Ohm (53.3 or 60 Ohm might work better with this RAM on MSI boards)
RAM Speed: 2933 or 3066Mhz
Timings: https://i.imgur.com/Fb9JxsW.png
Hope it helps.
Just bought this board and they have fixed the VRM heatsink thermal pad issue. I read elsewhere that people with bad VRM heatsink/thermal pad can get their board replaced for free as it wasn’t designed that way and was a manufacturing error. I’ve been overclocking my Ryzen 1500x to 4.025 ghz at 1.3875 volts completely stable. I have some dual-rank (samsung E-die) G.Skill ram rated for 3400 mhz CL16 which I had to manually tweak after setting the XMP profile in order to get stability even though the XMP profile did boot without a problem. More specifically f4-3400c16d-16gtz. I have it clocked at 3200 mhz, CL14 and also reduced some of the sub timings, however I needed to set the dram to 1.45 volts. Seems to be no problem given tridentZ superior heat spreader lol. Anyways performance is great.
Full system stress testing does make the VRM heatsink really hot, almost burning me to the touch. I would advise mounting a tiny fan onto the VRM heatsink for serious overclocking even with a 1500x and especially with 6-8 core ryzen chips.
Hi Jay. With the ASROCK AB350 and the Ryzen 1700 overclocked at 3.9ghz what is the maximum temperature under load obtained with the Noctua NH-L9a?
The CPU would hit the TJ Max with that configuration. I was only able to hit 3.7-3.8 comfortably.